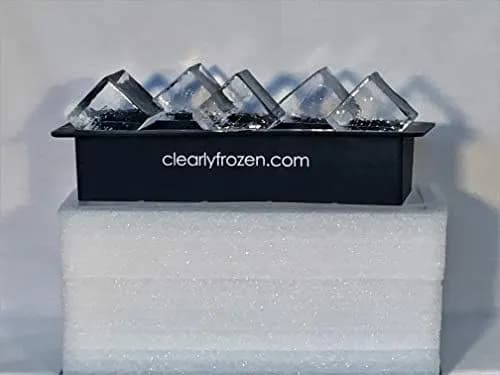
If you want to elevate your cocktail and mixology experience, improving your ice game is the simplest and most elegant option. Here’s our most reliable method for how to make clear ice.

We tried a number of methods, and we’ll tell you which approaches are a waste of time and more importantly, which method we found to be the easiest and most consistent for making restaurant quality, crystal-clear ice cubes as shown above.
Table of contents
Open Table of contents
Why Bother With Clear Ice
So, we like to drink whiskey. Like all whiskey enthusiasts, at some point we asked ourselves “How can I make this thing I love a slightly bigger piece of my personality?”
Joking aside, there are legitimate reasons to make and use clear ice:
- It’s more pure than regular ice, improving the flavor and aroma of your drink - and not just whiskey. See the science!
- A large ice cube will melt more slowly, diluting your drink less.
- It just looks better, plain and simple.
- Your guests will be impressed by something that is ultimately a low effort to do.
How to Make Clear Ice:
Option 1: Specialized Ice Tray (Recommended)
TLDR; go with this option. We used this ice tray, but other options that include insulation and directional freezing features will work as well.
- Invest in a specialized ice tray: Purchase a high-quality ice tray designed specifically for creating clear ice cubes.
- Check manufacturer instructions: If you have a different ice tray than us, check the manufacturer’s recommendations.
- Fill with water: Pour water into the ice tray, filling it to the appropriate level which is slightly below the top of our tray.
- Freeze for 24 hours: Place the filled ice tray in the freezer and wait 24 hours (time can vary). The top blue silicon piece of the tray should be completely frozen, while the lower compartment should still be partially liquid.
- Remove and enjoy: Taking the white plastic container out of the insulation and running it under warm water helped us remove the top section with ice cubes more easily. From here you can store the ice cubes back in the freezer for future use, or place one in a glass and enjoy!
Option 2: Filtered and Boiled Water Approach
We do not recommend this option. We followed all the steps described in other guides just to end up with regular-looking ice cubes. The filtering, boiling, and waiting had seemingly no impact.
Option 3: Insulated Mug or Small Cooler
This method, although a bit more work than option 1, was surprisingly effective and can be done with items you might already have at home.
- Find an insulated container: A Yeti tumbler or small, hard shell cooler will work perfectly - just make sure it fits in your freezer.
- Fill container 2/3 with water: Whatever you select, fill it two-thirds full of water.
- Freeze for 24 hours: Place the container in your freezer in a stable place where it won’t spill. Make sure the lid is off - you want to force directional freezing (top-down). If your cooler top isn’t removable, just open it fully.
- Remove the ice: This was where we started to struggle. Running warm water on the outside of your container and prying at the ice with a butter knife will eventually work though.
- Shape the ice (optional): Depending on the container you used, you may want to re-shape your ice. Place the ice block on a cutting board and slowly cut it into the desired shape(s) using a knife that you periodically run under warm water.
Conclusion:
Having tried all three methods, our preference is definitely to use a specialized ice tray, and it’s what we’ll continue doing. If you’re okay with a bit more work, option 3 also produces good results.
I’ve been interested in mixology for a while, but it still surprises me how much effort the pros put into ice alone. If you’d like to go even further down this frozen water rabbit hole, you should explore Ice Cube Stamps for added style and Lewis Bags for making top-tier crushed ice.
Now, sit back enjoy a glass of your favorite drink, and marvel at the beauty of your crystal-clear ice cubes. Stay tuned for more insights as we continue to explore both new and old hobbies.
Cheers!
